#Inspiration
How to Install Tin Ceiling Tiles Over Popcorn Ceilings?
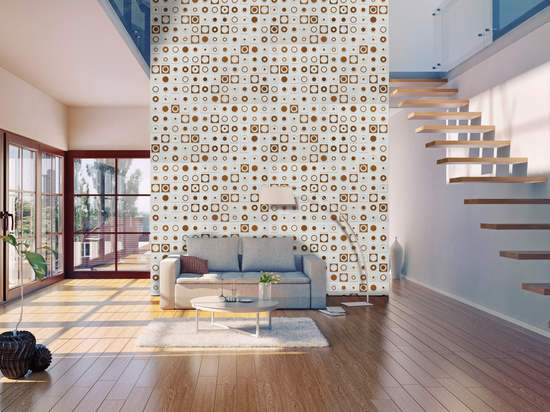
PVC Decorative Wall Panels
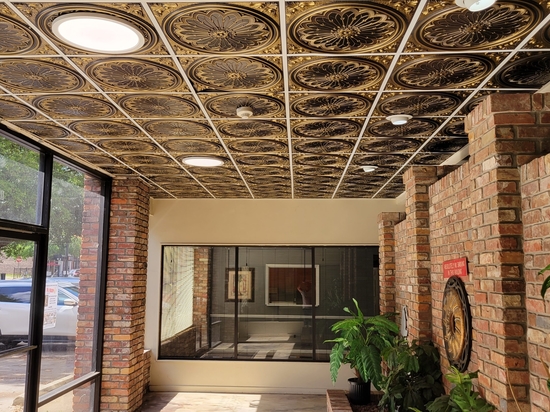
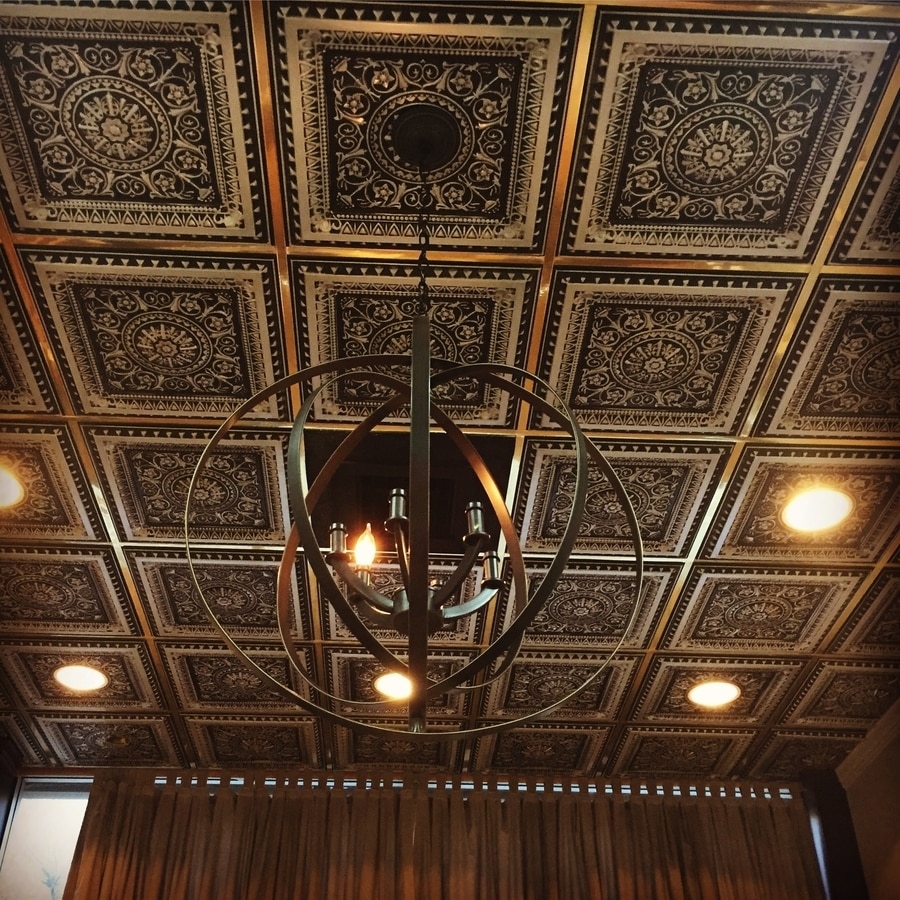
What Are Tin Ceiling Tiles?
Tin ceiling tiles are decorative panels with metallic tin or aluminum-like finish. These come in various designs that have features that give your ceiling a classic or modern look. Lightweight, durable, and easy to maintain, they are perfect for stylish ceiling upgrades in homes or offices.
Why Cover Popcorn Ceilings with Tin Ceiling Tiles?
Popcorn ceilings can look old-fashioned, and they’re hard to clean. Covering them with tin tiles offers several benefits, such as:
Tin ceiling tiles add beauty and character to any room.
They last a long time and don’t crack easily.
Tin tiles are simple to wipe down with a cloth.
They can help reduce echo in rooms with high ceilings.
Covering popcorn ceilings is faster and easier than removing them.
Things You Need for Installation
Before starting your DIY ceiling makeover, gather the following tools and materials:
Tin ceiling tiles
Measuring tape
Chalk or pencil
Tin snips or scissors
Ceiling adhesive
Small finishing nails or screws
Screwdriver or hammer
Safety goggles
Ladder
Step-by-Step Guide to Installing Tin Ceiling Tiles
1. Prepare the Ceiling
Before starting your tin ceiling tile installation, make sure your ceiling is clean and ready:
Use a broom or duster to remove cobwebs and dust from the popcorn texture.
If there are loose bits of popcorn ceiling, scrape them off gently.
Check for any cracks or holes and fill them with putty.
2. Measure Your Ceiling
To ensure you buy the right number of tiles:
Measure the length and width of the room using a measuring tape.
Divide the ceiling’s total area by the size of one tile to find out how many you’ll need.
Pro Tip: Buy a few extra tiles in case of mistakes or cutting errors!
3. Mark the Layout
To make your installation neat:
Use chalk or a pencil to draw a grid on the ceiling.
Start from the center of the ceiling and work outward.
Mark where each tile will go.
4. Cut the Tiles (If Needed)
Some tiles may need to be trimmed to fit around edges or light fixtures:
Use tin snips to cut the tiles to size.
Wear safety goggles while cutting to protect your eyes.
5. Apply Adhesive
For a secure hold:
Apply a thin layer of ceiling adhesive to the back of each tile.
Spread the adhesive evenly, especially around the edges.
6. Place the Tiles
Now, it’s time to stick the tiles to the ceiling:
Start in the center of the ceiling and work your way out.
Press each tile firmly against the ceiling, ensuring it sticks well.
Pro Tip: If your popcorn ceiling is very rough, use nails or screws in addition to adhesive for extra security.
7. Secure with Nails or Screws
For extra stability:
Place small finishing nails or screws at the corners of each tile.
Make sure they are flush with the surface so they don’t stick out.
8. Repeat the Process
Continue applying tiles row by row:
Align each tile carefully to avoid gaps or crooked lines.
Take your time to ensure a neat and professional look.
9. Add T-Grid Covers (Optional)
To finish the edges of the ceiling:
Install decorative t-grid covers around the perimeter.
This hides any uneven cuts and gives the ceiling a polished look.
Tips for a Successful Installation
Work with a Partner: Having someone help you hold the tiles can make the job easier.
Check Alignment Often: Step back every few rows to make sure the tiles are straight.
Take Breaks: Working on a ceiling can be tiring, so take breaks as needed.
Clean Up Immediately: Wipe off any excess adhesive before it dries.
Maintenance of Tin Ceiling Tiles
Once installed, tin ceiling tiles require minimal upkeep:
Regular Cleaning: Wipe them with a damp cloth to remove dust and dirt.
Avoid Harsh Chemicals: Use mild soap if necessary.
Check for Loose Tiles: Tighten any nails or screws if tiles become loose over time.
Final Thoughts
Installing tin ceiling tiles over popcorn ceilings is a smart and stylish way to upgrade your home. By following this step-by-step guide, you can achieve a beautiful ceiling without removing the messy popcorn texture.
Not only do tin ceiling tiles improve the appearance of your space, but they also add durability and character. Whether you’re refreshing a single room or your entire home, tin tiles are a fantastic choice for a popcorn ceiling transformation that will make your ceilings stand out.
Go, gather your tools, plan your layout, and get started on this exciting DIY ceiling makeover today!